Customer support portal - creating a ticket
Creating a new ticket
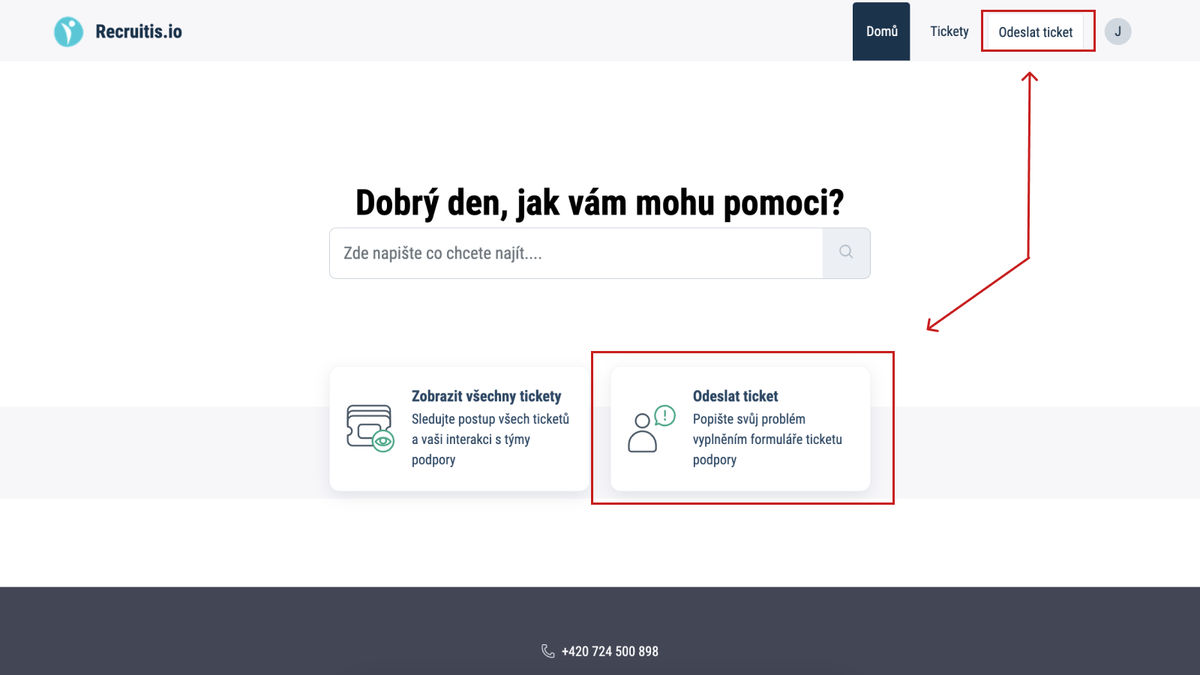
Once you are logged in to the system, you can create and send a new ticket. Simply select the "Send ticket" option on the main page - see screenshot below.
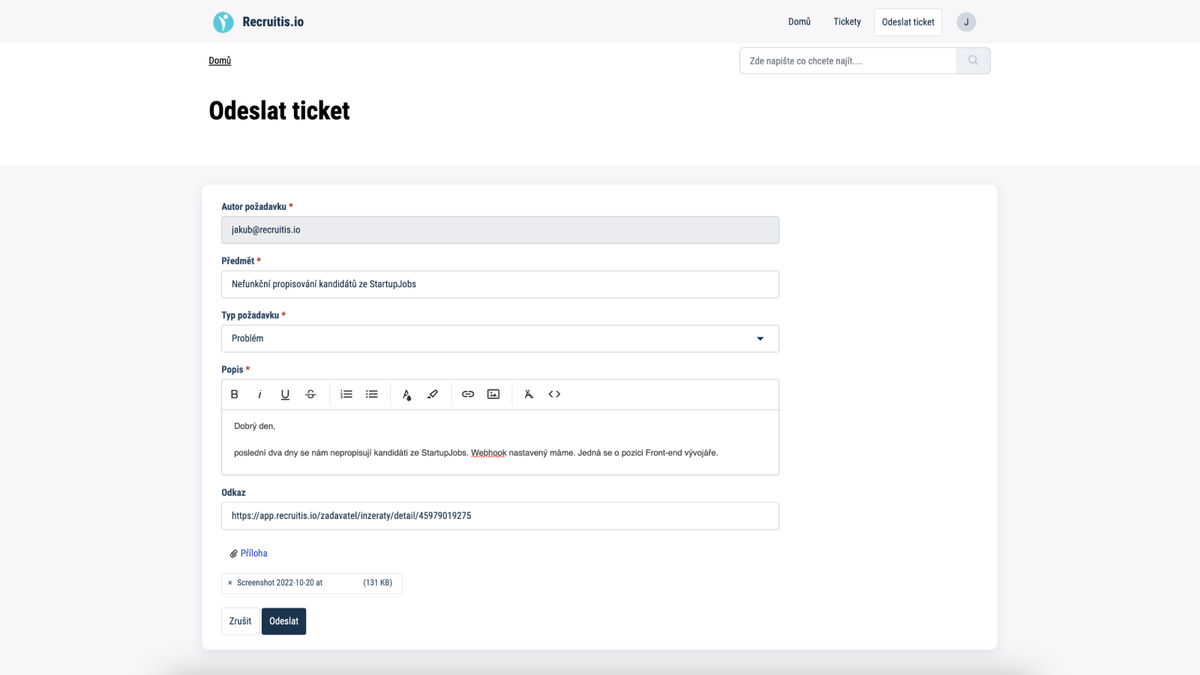
In the form that opens, you need to fill in the following fields:
- Subject (required field)
- A general description of the request, e.g. "Error uploading attachments for candidates" or "Emails sent from Recruitis cannot be delivered".
- Request type (required field)
- Select one of the options in the menu.
- Description (required field)
- Space for a detailed description of a problem, question or suggestion for improvement.
- Link
- If the problem concerns a specific candidate, position or advertisement, you can also add a link copied from the address bar of your browser for easier orientation.
If you want to attach a file to the ticket, you can find the "Attachment" button at the bottom.
Once you have filled in all the required fields and attached the attachment, just click on the "Send" button. After the ticket has been delivered, you will immediately receive a confirmation by e-mail that everything has arrived in order.
Viewing open tickets
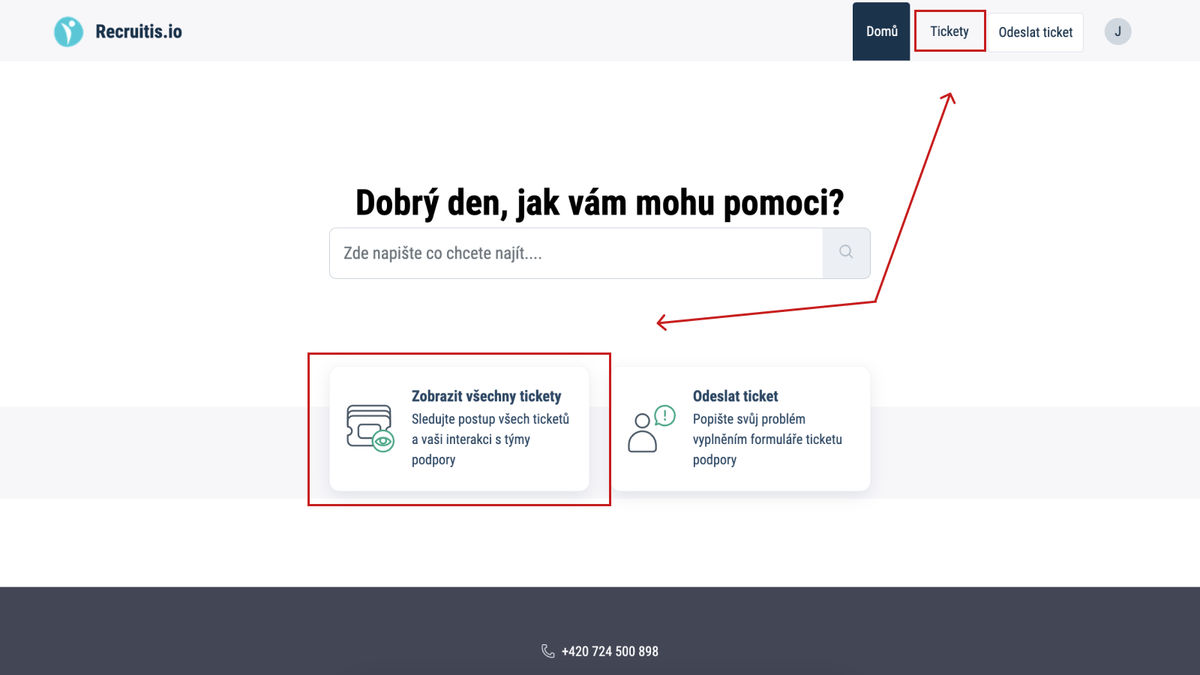
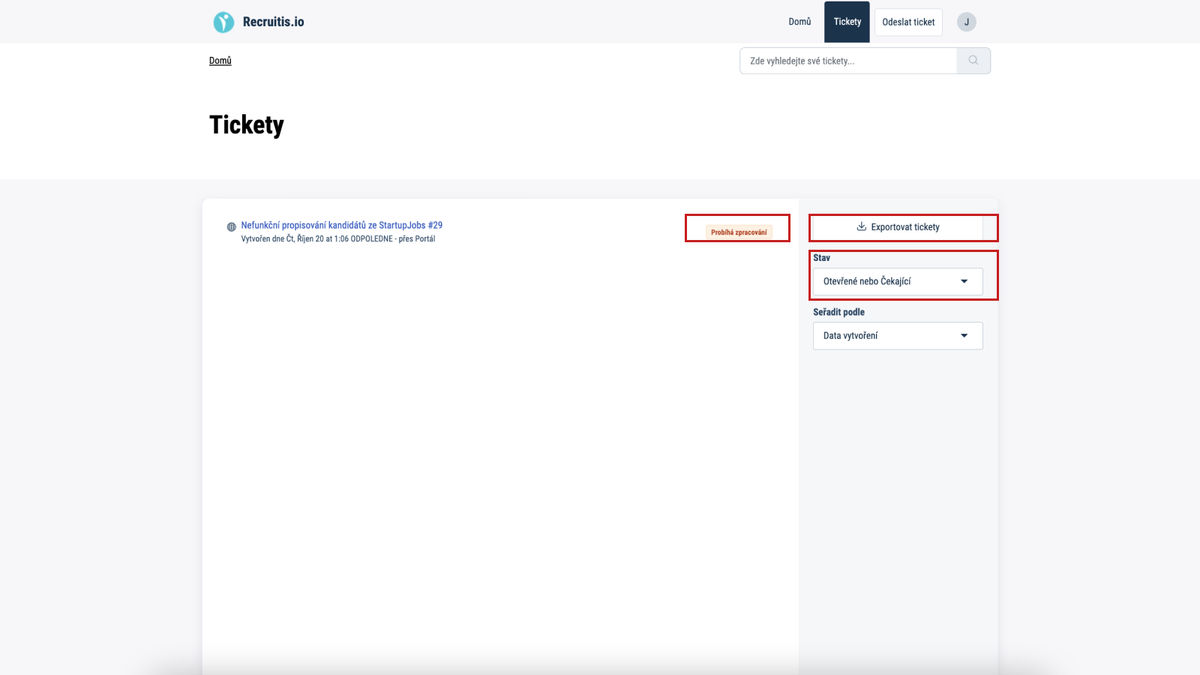
For all sent tickets, you can view the current status of your request. You can access the overview by clicking on the "View all tickets" button on the main page of the portal, or you can also use the "Tickets" button in the top menu, see screenshot below.
In the next window, you can see a list of all open and pending tickets, including their status. We will describe the individual states in more detail below.
You can also change the status to "Resolved or closed" and see what requests you've had historically. Tickets can also be exported to .csv or .xls format and further work with the downloaded data in various reports.
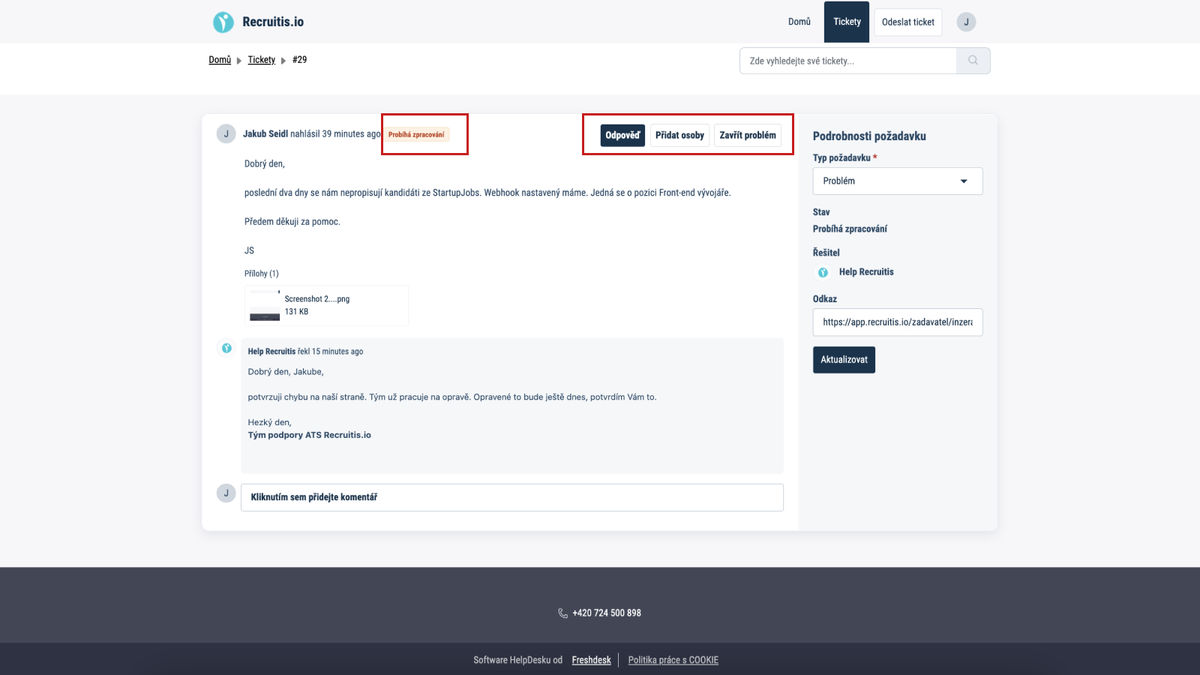
In the detail of a specific ticket (see screenshot below) you can see all communication between you and our customer support. You can add other people to the communication by clicking the "Add people" button. If you manage to solve the problem yourself, or if your request is no longer current, you can close the ticket by clicking the "Close problem" button.
As for the individual conditions, you will most often encounter:
- Processing is in progress
- We received your request in good order and are working on it.
- Awaiting your reply
- Our team is waiting for your response.
- This ticket has already been resolved
- The problem has been fixed or it is not a problem at all, we have taken into account the suggestion for improvement. In short, there is no need to solve anything else. However, if you reply to a ticket marked in this way, it will automatically switch to the "Processing in progress" status.
